Appearance
Blueback Investigator Quick Guide
Examples
Applying a seismic filter to entire 3D cube
Option for introduction slide.
Applying a seismic filter to entire 3D volume
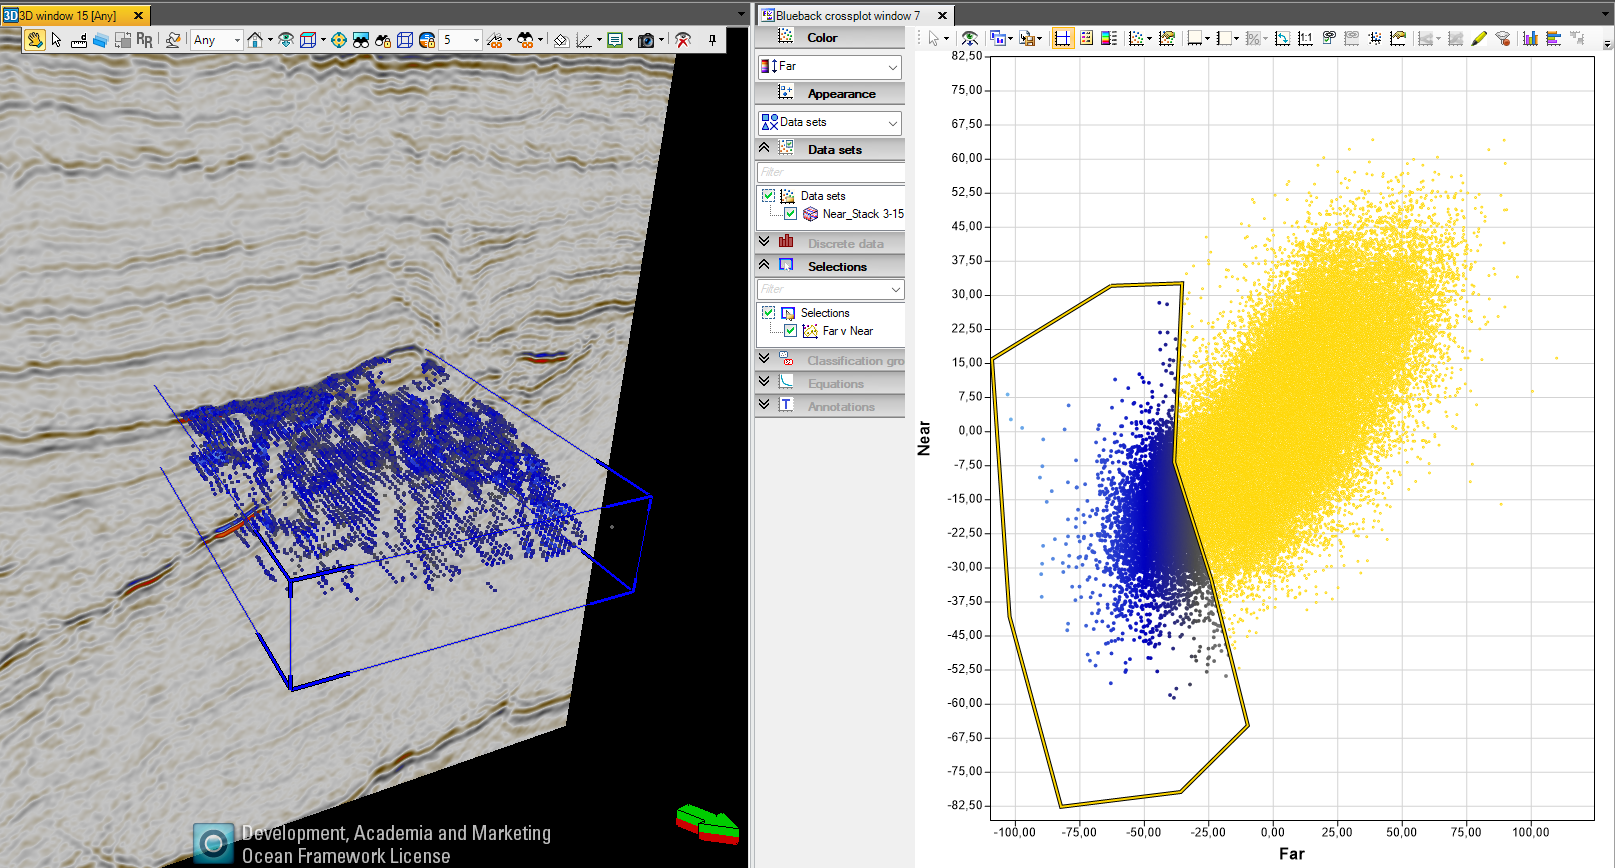
Having identified features in your seismic by applying a filter and posting back to a Petrel window, you want to apply this filtering on the entire 3D seismic cube
This can be done by the discrete classification workflow
Applying a seismic filter to entire 3D volume
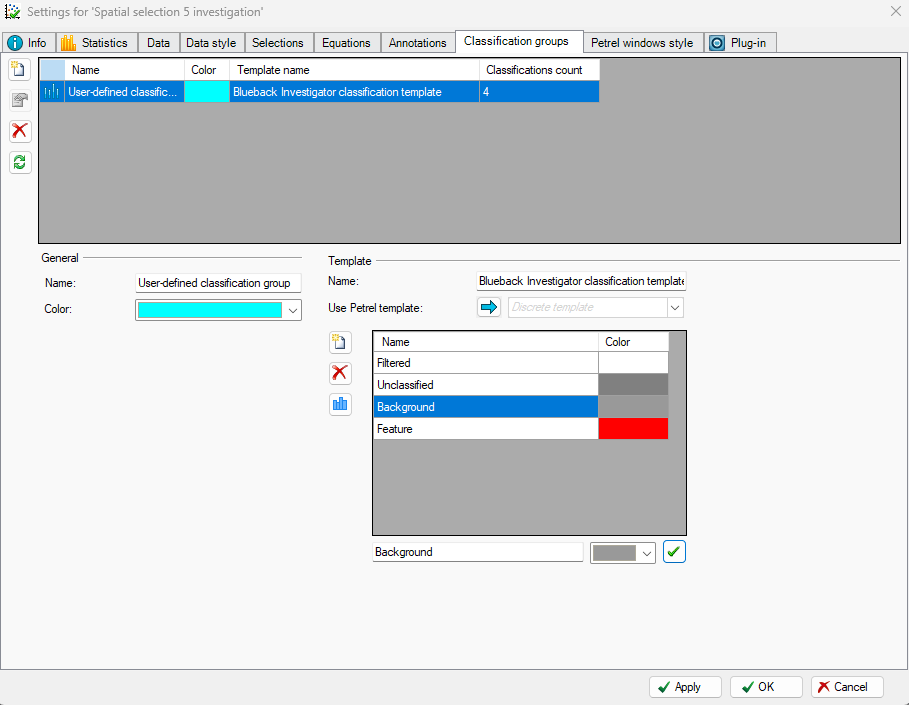
Go to the investigator settings, Classification group and create a new group with two classes, e.g. ‘Feature’ and ‘Background’
Applying a seismic filter to entire 3D volume

Digitize two classification regions in the x-plot, one that is identical to the existing filter, and one that covers the rest (make sure to make the regions big enough to cover values from the entire cube
Applying a seismic filter to entire 3D volume
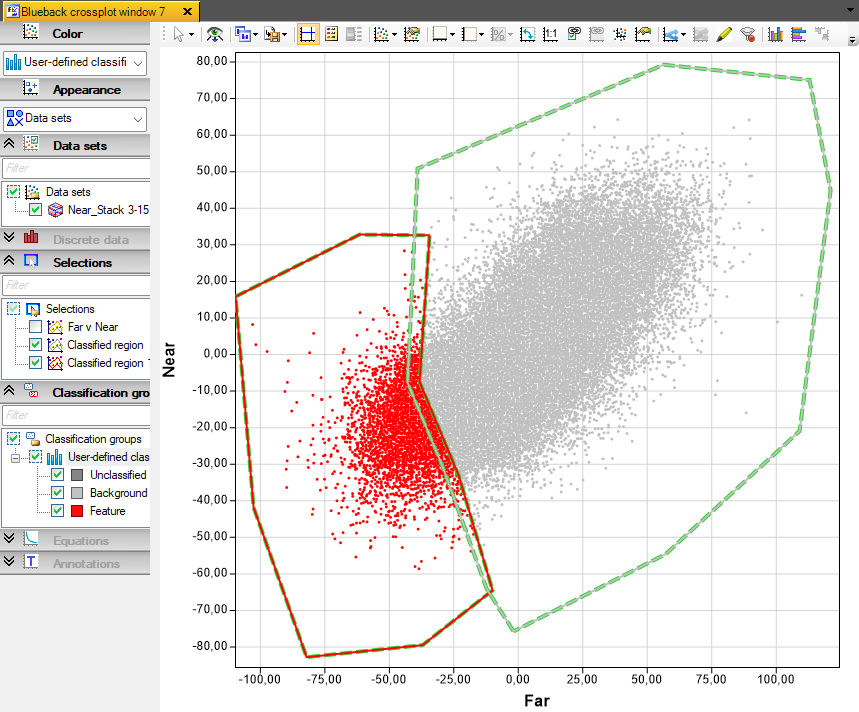
Assign classes to the classification regions (RMP on the polygon – assign classification – user defined classification group – select group)

Applying a seismic filter to entire 3D volume
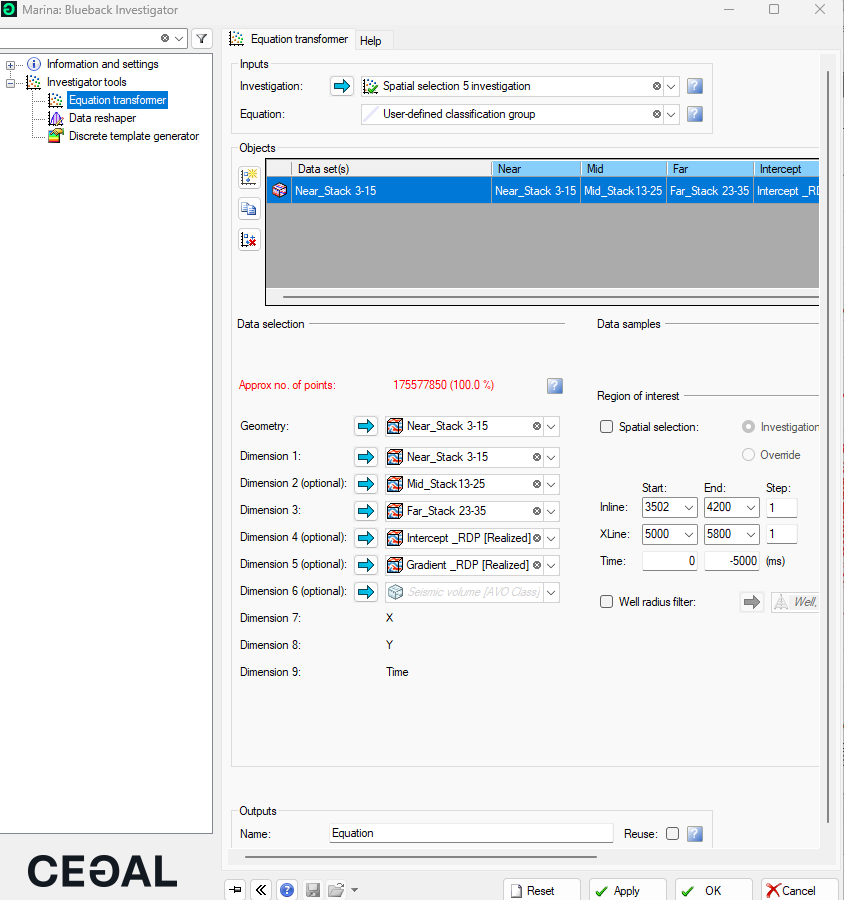
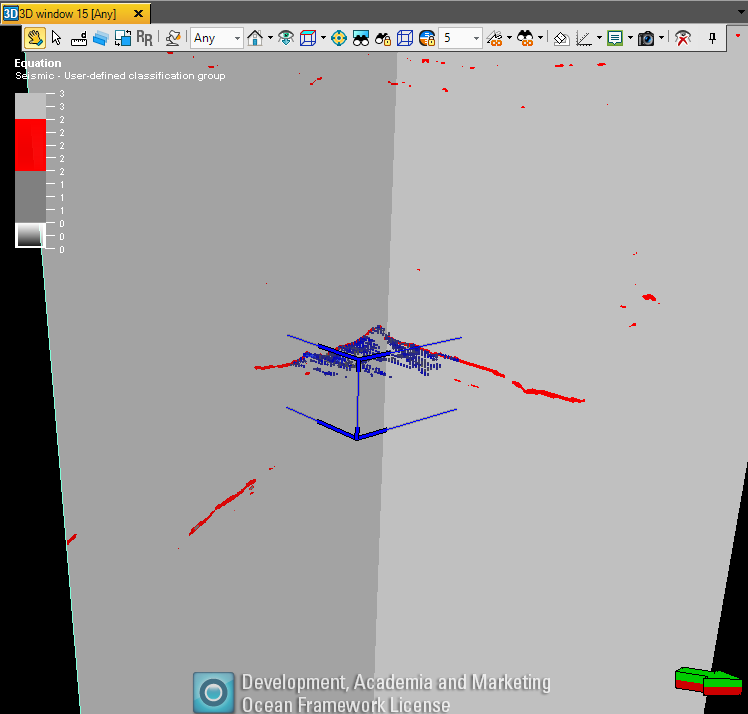
Open the Investigator – Transformer tool from the Marina menu, select the investigation with the classification, add a data set for the entire cube that has the same variables, untoggle ‘Spatial selector’ and hit OK/Apply – a new discrete 3D seismic cube is created, where the filtered feature is one of the classes